- Empty cart.
- Continue Shopping
Vinyl Sticker Application Instructions
Please follow the instructions below to apply your vinyl sticker/decal and you'll have the job done in no time and with the best result.
You can apply a vinyl sticker to any flat surface: vehicle body or window, painted wall, wallpaper, mirror etc. Our decals are weatherproof (waterproof) so you may apply them to your vehicle, garage door or to a glass partition in your bathroom. Before starting please note the following:
- The things you’ll need for vinyl sticker application: a sticky tape (Scotch tape), a plastic squeegee or any hard plastic ID card (a credit card, a license card etc), a measuring tape or a ruler, scissors or/and an executive knife, soapy water (for rather big stickers) and a dry cloth.
- If you applying a big sticker (let’s say with the size more than 24”x18”), ask somebody to help you. In this case we recommend using “wet application method”:
- When applying medium to large sized stickers, you may spray a bit of soapy water before application. It will help adjust a sticker position in case if you don’t get it right the first time by sliding it into the correct spot, then squeeze the water out (with a plastic card or squeegee) and leave the applied decal for a few hours to dry.
- If you applying a small sticker (let’s say with the size less than 10”x10”), you can easily handle it yourself and we recommend using “dry application method” (without a soapy water). Please note that you have only one chance to apply a sticker. Once a vinyl decal is applied, it can’t be removed without damaging the vinyl.
- If you’re applying a large sticker onto an outdoor wall, vehicle or any outdoor surface, avoid doing so on a windy day. It’s easy to damage a decal by getting it stuck accidentally to unwanted surfaces and dust will stick to adhesive surface very quickly. You may ask somebody to hold one end of a decal while you are working on the other end.
- Avoid applying stickers when the temperature is below +5C (41F). Vinyl becomes fragile and doesn’t stick well. If you applying a decal to a vehicle in a winter time, it’s a good idea using a garage.
- If possible, cut large sticker parts into smaller pieces to make application easier. Just make sure they are aligned properly before ultimately applying all parts of a large sticker.
- If you have received your sticker in a mailing tube, box or folded in an envelope, place it flat on a table with something heavy on top (books for example). Do this at least an hour before application to avoid the sticker curling back on itself during application.
- Cut out decals are sandwiched between a backing sheet and application (masking) paper. DO NOT remove any of the layers before application begins.
- We apply a masking paper on a decal after cutting out a contour and weeding the rest of vinyl. This masking paper protects a vinyl decal from scratching so you may firmly press a squeegee to the masking paper. Printed image on the contrary can be easily scratched by a plastic card or a squeegee so be very careful when applying a printed sticker. To avoid scratches the best way is to place a double side sticky tape to a small piece of a soft cloth (flannel) and to wrap a working side of a squeegee with this sticky flannel piece. The double sticky tape holds a flannel piece and plastic doesn’t touch a printed image. If you don’t want to waste your time on such a preparation, just wrap the whole squeegee with a soft cloth and press a printed sticker through this cloth.
How to apply a cut out vinyl decal:
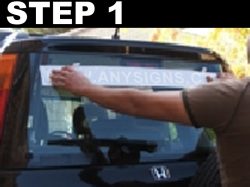
1. Clean the surface thoroughly with soapy water or glass cleaner then dry with a cloth. Measure and mark the exact spot where your sticker is going.
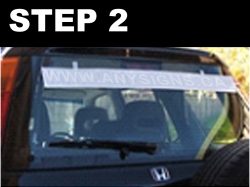
2. Position your sticker in place using a masking paper, leaving one end free. If the sticker is too long, you can place the masking paper in the center and do it in 2 steps.
3. Peel back the application paper gently, making sure the sticker is stuck on it. Fold the backing paper sheet about 1 – 2in (usually the shortest side) to expose a small adhesive area of your vinyl decal. Cut some of the backing paper with scissors if necessary.
4. Hold the sticker from the free end and pull tightly close to the surface but don’t let it touch the surface yet.
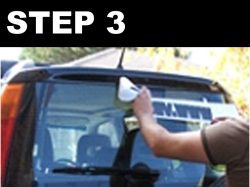
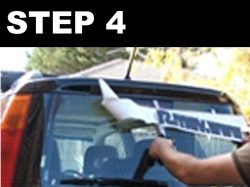
5. With a plastic card (squeegee) in the other hand, start applying some pressure on the sticker smoothing it from the center to the edges and from the top to the bottom gradually removing (pulling out) a backing paper from beneath of the applied vinyl. movement until you reach the end. Remember to keep an eye on the alignment of your sticker.
6. Once the masking paper with the sticker is applied and the backing paper is removed completely, run the squeegee along your sticker few more times with more pressure to achieve strong adhesion.
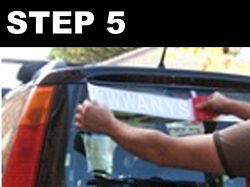
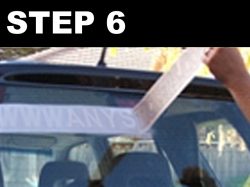
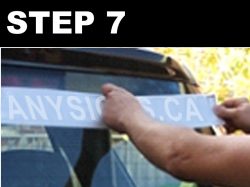
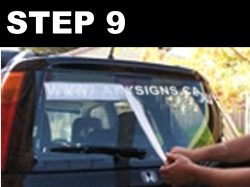
7. Peel back the masking paper gently but firmly, pulling it out from any corner, making sure not to peel the sticker off with it. Check out that all parts of the sticker are stuck to the surface you apply it to.
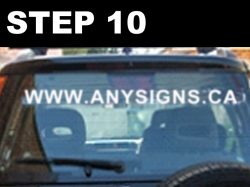
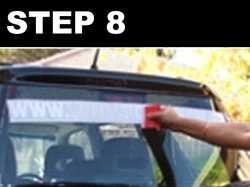
8. If any air bubbles appear, you can pierce the edge with a needle and force the air out with your finger or a squeegee. Vinyl sticker is applied!
